Our Landmark Home and Land Company Experience
Ply Cladding
Tuesday was washed out by the first rain on our framing project. However, Wednesday was dry enough for us to continue.
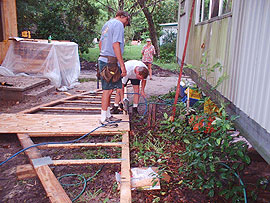
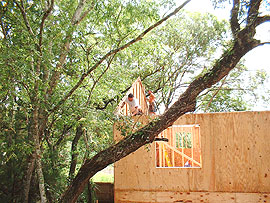
The crane was ordered for 10:30AM, so at 7:30AM Pat and Hollywood started nailing the 5/8″ ply cladding to the roof gable ends. Note the pile of ply protected from the rain in the background and Barbie watching the proceedings
2nd Story Cladding
Within 2 hours, both gable ends are clad and 1 1/2″ slots are cut in the “top rail” (upper, angled part of the truss) to hold 2×4 outrigger “lookout blocks” that will support the 2′ overhang.
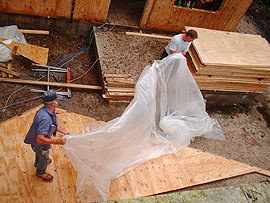
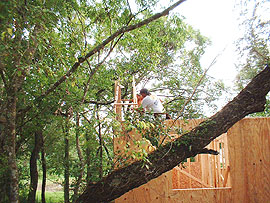
Here Pat and Jim are uncovering the ply cladding to prepare it for lifting onto the second story. Just behind Pat you can see 1×4 supports cut to fit between the trusses to hold them in place while there are carefully fitted to the second story exterior wall frame. If you look close, you can see the outrigger slots, too.
Crane
The crane arrived almost 3 hours late. This happens, sometimes. The crew used the time to deal with small tasks.
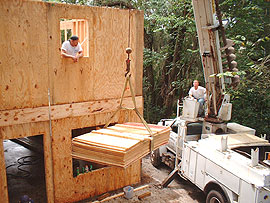
Here you can see the cladding being lifted to the second story. Note the extremely tight fit for the crane truck between the trees and the house and Mick in the window ready to guide the load past the edge of the wall.
Gable
Here Hollywood and Mick are ready at the far edge of the house from the crane, next to two reinforced 2x4s that are already nailed to the walls as support for the gable. Mick is about to guide the sharp corner of the first gable end away from the wall. Barely visible over the top of the gable-end is Pat’s head, above the far wall. He stands ready to help drag the gable into place.
Gable End
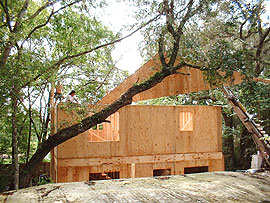
With the gable supported by the reinforced 2x4s on the walls, Mick and Hollywood measure and mallet the gable-end in place, delighted to find that it lines up perfectly with the framed exterior walls.
Note the tree branches that are very close to the work. We wanted our house to be up in the canopy and allowed for some tight squeezes. Everything fitted well, though, and just one branch had to be trimmed.
Roof Support
Soon, the first roof support truss is swung into place by the crane and the crew set to work alignning it with the gable-end.
Note the 1×4 supports being nailed between the gable and truss and the 1 1/2″ slots just visible on the gable top rail.
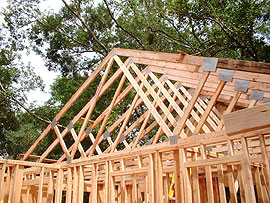
Trusses Aligned
Within two hours, a phalanx of trusses are aligned and spaced on the second story walls. Each truss is numbered according to its placement in reference to a map of the truss layout supplied by Landmark
This view is from inside the main bedroom.
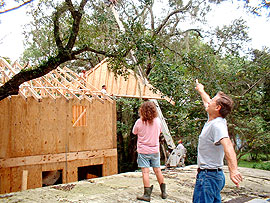
Last Gable-End
Within 3 1/2 hours of the crane arriving, the last gable-end is hoisted into place and secured by a happy crew.
Here Elizabeth is video taping the scene from the roof of the mobile home while our friend, Al, celebrates.
Tomorrow, the crew will fully secure and align the trusses before nailing the ply cladding to them to form the roof.
NEXT –> Day 8
